The Agent Home Page
The agent home page is where most of the key elements of an agents such as it's configuration, reporting, preview launcher and many other lives.
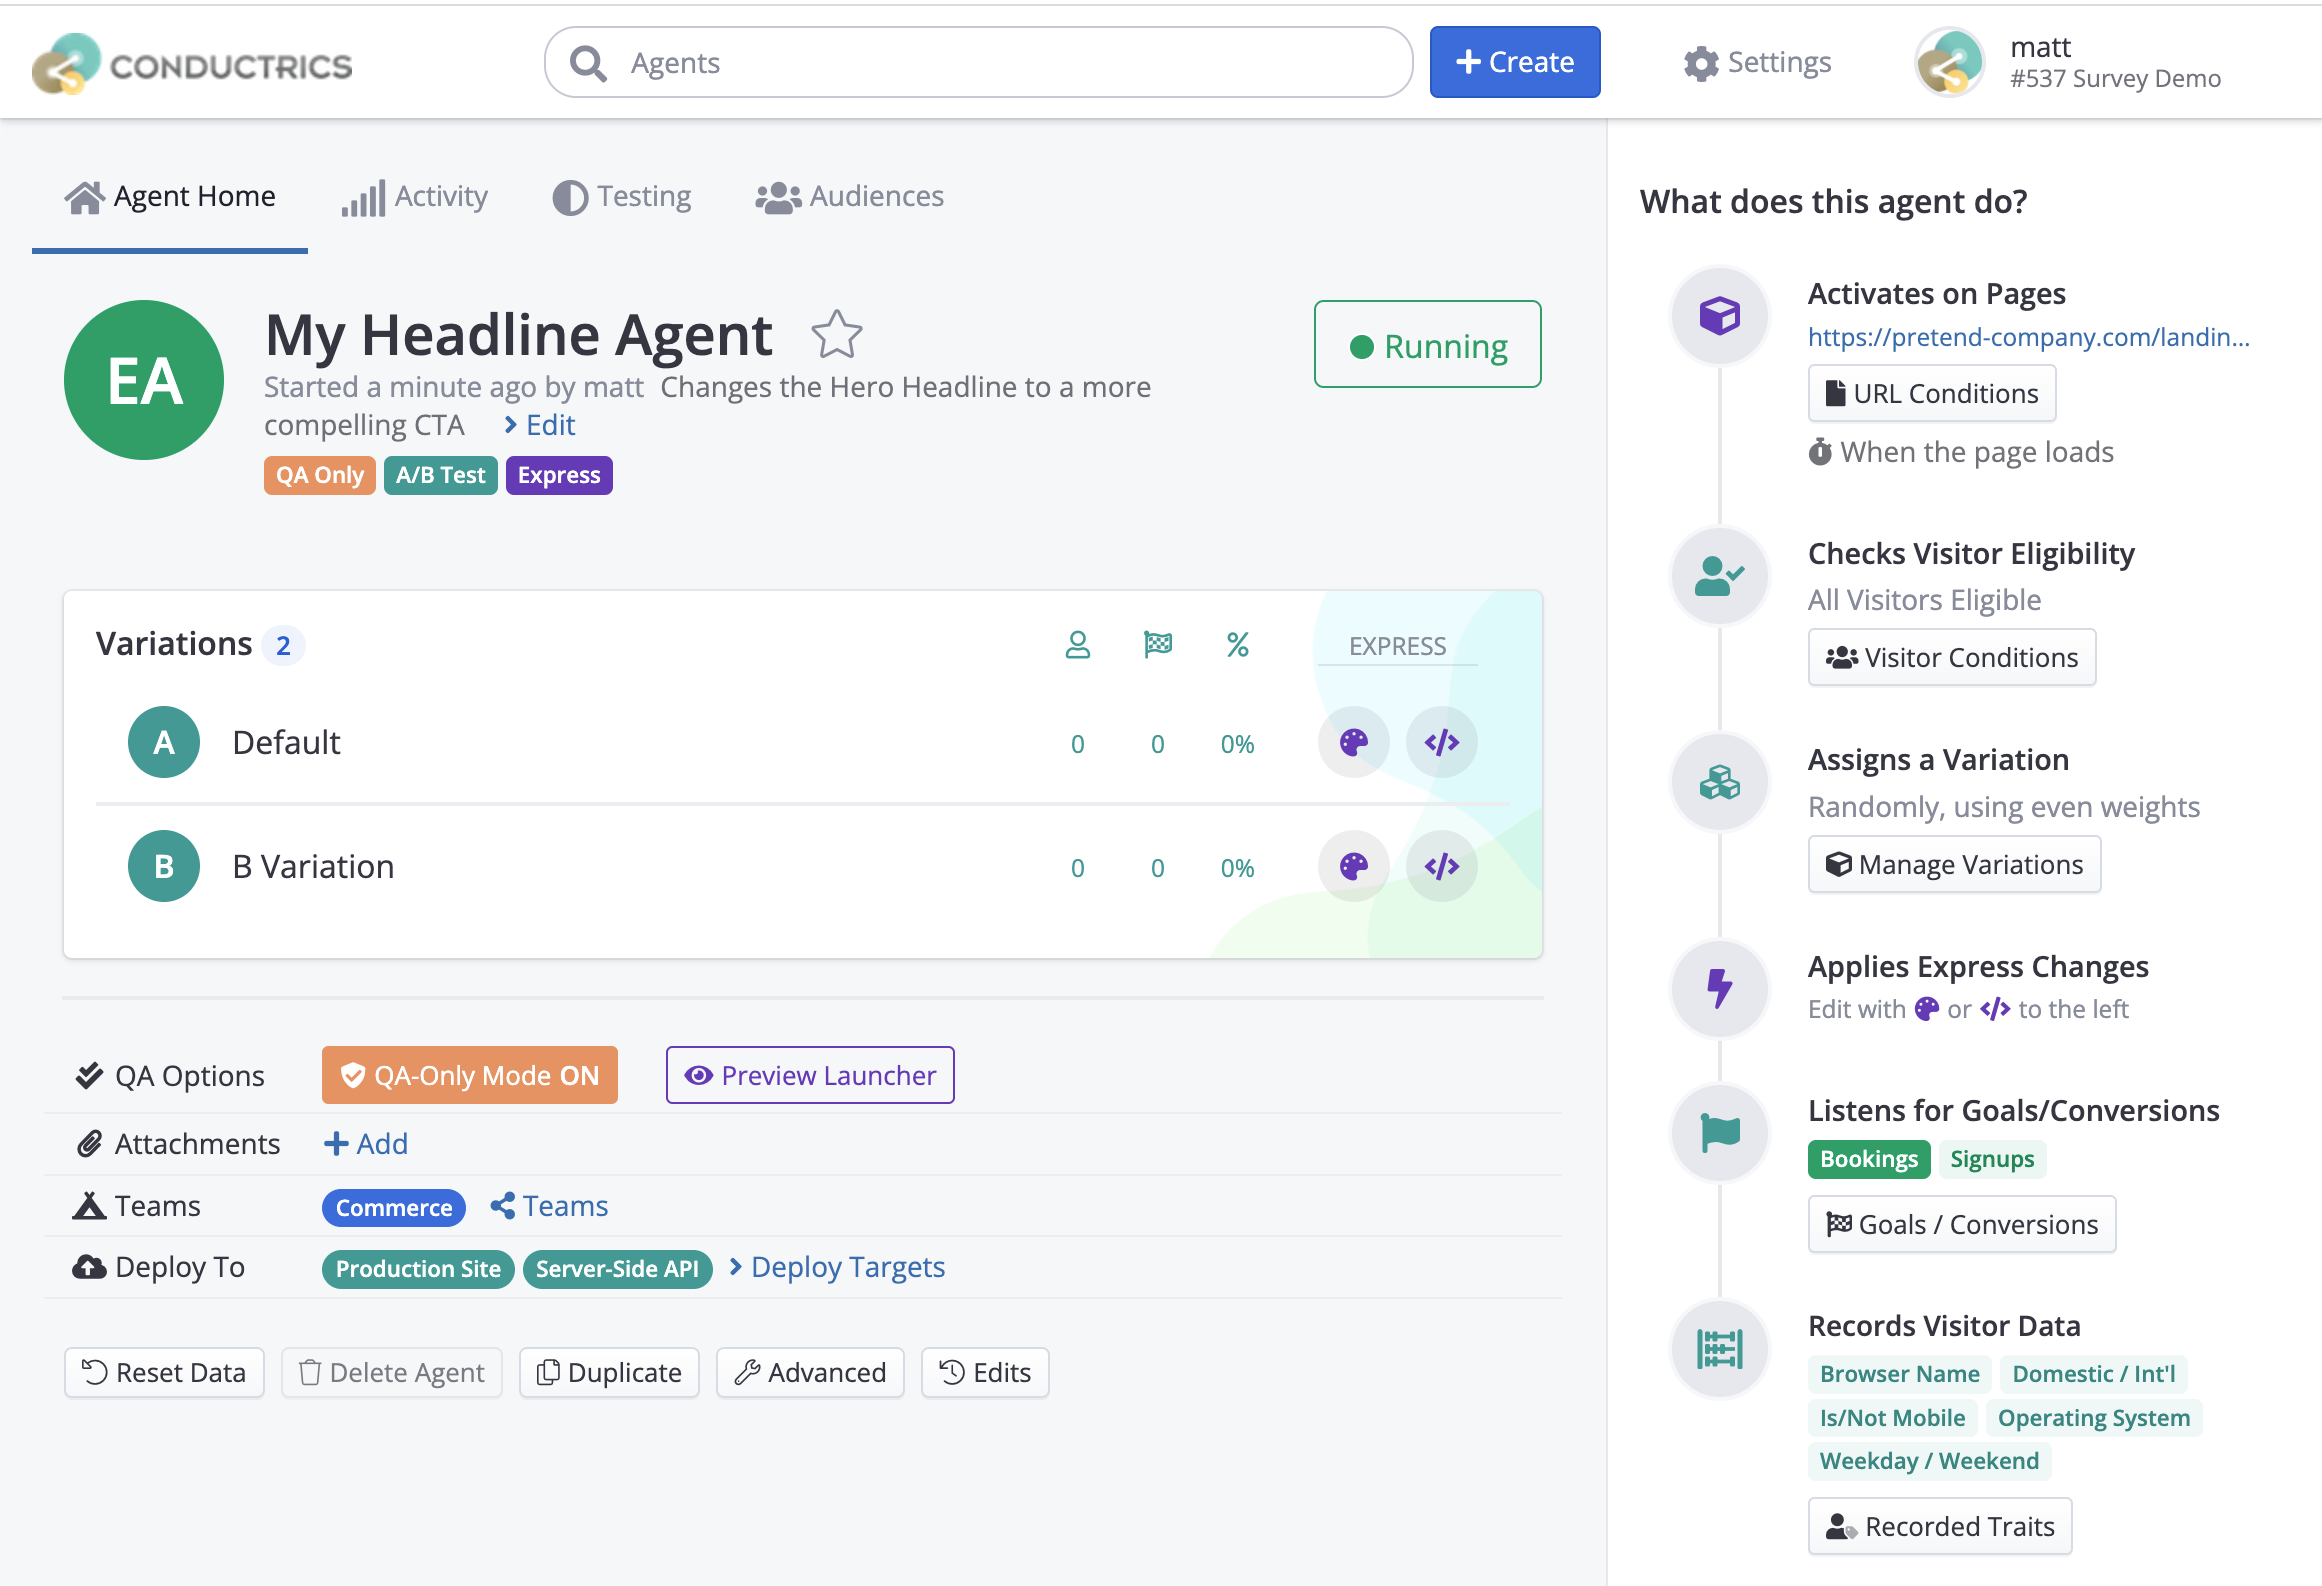
You can access the Agent's Home Page by clicking on the Home button of said agent from the Agent List page.

Right on the top of the agent home, you'll see a little nav bar to navigate through the different reporting views Conductrics has to offer:
- Activity
- Testing
- Audiences
These are discussed further on the Reporting section of the docs starting with the Activity Report

Below the nav bar we have some descriptive information about the agent. This includes:
- The Agent Name and description
- Some agent's tags (like type of agent, implementation method, QA mode, etc)
- The Agent's status (Running, Stopped, Paused, and Archived) which can be changed by clicking the status button
- If using a set test duration, it will display the number of days from the total amount of days that the test has been running for
Now moving to the section below, you'll see the Variations section.

This includes a list of all the variations included in the agent, and for each you'll see (in order from left to right):
- The number of visitors who got the variation
- The number of goals / conversions from each variation
- The Conversion Rate for each
If the Agent is an Express Agent, you'll also see
- The WYS button which will trigger the WYSIWYG mode
- The </> JS button which will open the Custom JS modal
- The *Macro's button which will open a Macro selection from available macros
Lastly at the very bottom of the Agent's Home page we will find further configuration options.

Starting from top to bottom we see:
- Agent Code: This is the internal code that both the Conductrics script or the REST API use for identifying and interacting with this agent
- QA Options: From here you can set the agent's QA mode and also trigger the Preview Launcher
- Attachments: From here you can place any URL that links to a document that provides additional context or material for the Agent in question
- Deploy To: This shows to what Deploy Targets this agent is being deployed too and lets you add more or remove some
- The last row includes some more features and advance configurations like Resetting the entire collected data of the agent (visitors, goals, etc.), deleting the agent, and so on.
Now if we move to the right of right of the screen, we should see the Right Sidebar like the following:

This sidebar handles most of the agent configuration, from when to trigger, how to assign variations, and what data to collect from Goals/Conversions and Visitors Trait.
In order from top to bottom will find:
- Check Visitors Eligibility: This handles the conditions that need to be fulfilled in order for the agent to trigger / run. The conditions vary from items such as browser type, URL, Geographic, Time and Date, and even Visitor Traits.
- Assigns a Variation: This will open the Variations Modal, which lets you add or remove variations, change it's weights and the Selection Policy.
- Listen for Goals / Conversions: From here you can tell the Agent which goals to listen to, from either Express, API or both. It also lets you set any of those as Primary or Secondary goals. You can find more information on Goals / Conversions here
- Record Visitor Traits: This section lets you check which Visitor Traits, either default ones or Custom ones, the agent should collect so it can later be added to the reporting for either breakdown analysis or Audiences. You can find more information on Visitor Traits here
Also, if the agent is an Express Agent, you'll see 2 other items on the Sidebar:
- Activates On Pages: This lets you set in which URL or View-State conditions the agent should trigger. It works similar to the Check Visitors Eligibility, it just runs before checking for the conditions of the latter.
- Applies Express Changes: This is just an informative step as to at what moment / step the agent runs the Express Changes made from either the WYSIWYG or Custom JS options.
Updated over 1 year ago