Using Express Macros
Express "Macros" are reusable JavaScript functions that allow you to consistently incorporate custom page changes or other logic in your pages.
When to Use?
Consider using Express Macros when you have a testing or targeting scenario which will be "repeated" often. For instance, let's say you want to frequently do headline testing on a news page, or change certain areas of a landing page. In such a situation, you don't need users to have full page-editing capabilities - instead you might just want them to fill in a simple form to get a new test or campaign up and running.
We Can Help!Let us know if you'd like Conductrics to create or review a macro for you.
Creating an Express Macro
The first step is to create your Express Macro in the Conductrics Admin. There are basically three parts to a macro:
- A set of fields, which generate a customized form to fill out when creating an agent later. For instance, you might have a field named
headingand another calledhero-image. - A block of JavaScript code, which runs when visitors come to a page with an agent that uses the macro. The JS code will have access to a
fieldsobject, which contains the values provided to the custom form. For instance,fields.headingwould contain the heading provided in the custom form when the agent was created. - A friendly name, which other users will use to create agents from the macro.
The steps to creating the macro are simple:
- Go to Settings > Express Macros in the Conductrics Admin.
- Hit + New Macro.
- Provide a name for your new macro.
- Fill in the Fields and JavaScript tabs as discussed below.
- Click Save Changes when finished.
Here's the first part, where you provide the name of the macro:

Creating a macro
Defining Your Macro's Fields
Your macro's fields are the "items" the macro will use to make the desired changes on the page.
A couple of things you should know about this fields are:
- Each field's key is what will be used in your JavaScript code. In the second screenshot below, the keys are
heading,intro, andhero, which means that the JavaScript code will be able to usefields.heading,fields.intro, andfields.heroto make the appropriate changes to the page. - Each field has a
UI Name, which is later displayed in the custom form presented when creating an agent that uses this macro as a "friendlier" name to reference the field in question. - Each field supports either numbers, letters
-and_. - Each field can have a
requiredflag, which determines whether the admin user can leave the field blank in the custom form presented when creating an agent with this macro. - Each field has an optional
Validity Regexwhich serves a way to test what the user passes as a field value when using this macro. If the inputted value passes this Regex then its allowed to be used.

Defining your macro's fields

Providing Your Macro's JavaScript Code
The most important step is to provide the JavaScript code for your macro. This is what makes the macro actually do something useful.
Whatever JavaScript code you provide will execute when visitors come to pages with agents that use the macro. For instance, if you've defined fields called heading, intro, and hero as shown in the section above, that means that your JavaScript code will be able to use fields.heading, fields.intro, and fields.hero to make the appropriate changes to the page.
The screenshot below shows a simple example of how you might use some field values within your JavaScript code. This is of course just an example - the actual JavaScript code will depend on what you want your macro to accomplish, and the actual structure of your pages.
To make things a little easier, you can use the "Insert" button at top right (shown below) to insert the reference to a particular field.

Providing your macro's JavaScript
Using the Context Object in Your Macro's JavaScript (Optional)
When the JavaScript for your macro executes, Conductrics will pass in a "Context" object with a few pieces of information that can be helpful. The context object is visible to your code as ctx and contains the following:
-
ctx.agent(string) - the API code for the agent in question. You can use this internally as needed. -
ctx.sel(added in 3.7.15) - information about the variation selection for the agent in question. Specifically,ctx.sel.cwill contain the variation's API code (such asB), andctx.sel.pwill contain the Selection Policy code (such asrfor random orsfor "sticky" selections). -
ctx.log(function) - You can use this function to emit log messages in the same way that Conductrics logs them internally. Please note that the messages will only display in the JS Console if the "Enable Debugging Messages" option is enabled for your Deploy Target, and thec-conductrics-debugflag is set totruein your browser's Local Storage. -
ctx.watch- (object, optional) - If your macro will be running on a page that uses React or similar "single page app" style framework, or if your macro is making changes to a dynamic area of the page (such as a carousel or other area which appears after the page first loads), you might want Conductrics to "watch" for subsequent changes to the affected portion of the page. If so, setctx.watchto an object, where the object contains an array calledtargets(such asctx.watch = {targets: [my_element]};). Thetargetsarray should contain the DOM elements (not selectors) that should be "watched". When the other script makes changes within the watched element(s), Conductrics will attempt to re-execute your macro's JavaScript code, presumably causing your variation to again appear correctly.
Conductrics uses a MutationObserver internally to provide the
ctx.watchfunctionality. Generally speaking, your macro's JavaScript code will be re-executed before the next animation frame, which should avoid flicker problems. That said, thectx.watchapproach is best for basic DOM changes; don't use it if your macro's JavaScript code does a lot of "heavy lifting" or asynchronous lookups, etc. Feel free to reach out to Conductrics to discuss.
Using Your Macro
Now that your macro has been created, it's time to use it in an actual test or targeting agent.
- If the macro has the Available to add to Variations on Express Agents option checked (see section above), you'll create an Express Agent first, then add your macro.
- If the option is unchecked, you'll create an Agent Template that uses the macro. Then people can create new agents from the template.
Adding your Macro to an Express Agent
If the macro has the Available to add to Variations on Express Agents option checked, follow these steps to actually use the macro:
- At the main Agent List page in the Conductrics Admin, hit Express Agent to start creating a new agent, then hit skip this step to skip the usual visual-setup step.
- Provide a name for your new agent, and provide the URL for the page that you want to use your macro on (or use the URL Conditions option if you want to activate the agent based on wildcards or URL params).
- Go ahead and create the agent, then hit Edit Agent at top right of the agent's page.
- Open the Express menu under the "B" Variation (or whatever variation you wish), and click the name of your macro (see screenshot below).
- Complete the form that appears, which is based on the fields you provided when creating the macro.

Now you can make whatever other changes to the agent that you need, such as setting up Goal/Conversion events, adding Targeted Selection rules, custom weights per variation, and so on. You can preview the macro's effect on your actual pages, or you can start the agent to make it available to your actual visitors.
Creating a Template Agent for Your Macro
Alternatively, you can create a "Template Agent" that uses your macro. Then actual agents can be made from the template.
This allows people to use macro in one step, rather than first creating the agent and then adding the macro (as discussed in above section). This one-step workflow can be useful if you have some users that really only want to use macros and don't want to fool around with the other details of setting up an agent.
Here's how to proceed:
- Create an Express Agent normally, using the skip this step option (shown earlier) to skip the visual-setup part.
- Set up the agent as you wish, including URL Conditions, Targeted Selection Rules, Goal/Conversion Events, Deploy Targets, and so on.
- At the bottom of the agent's page, hit Template.
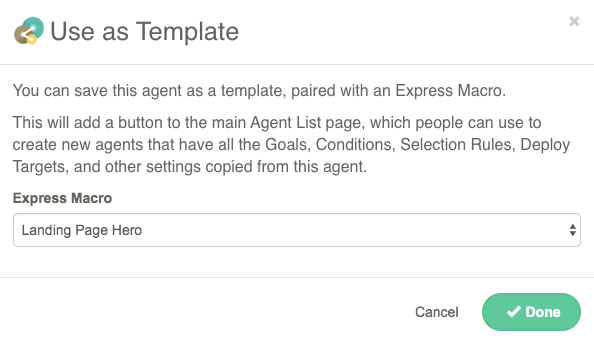
- In the "Use As Template" window that appears, select your Macro as shown below and click Done.
If you want to make changes to the template agent later, note that it doesn't show by default in the Agent List page. However, you can check the "Template Agent" item in the filter section in the right margin to reveal the template agent.
Now people can create new agents quickly and easily:
- On the Agent List page, note that a button now appears for the template agent you created.
- Click the button and fill out the form that appears (the form is generated from your macro's fields as discussed in the first section above).
- If you want the new agent to be created as "Running", check the Start Immediately checkbox. Note that this may cause the agent to be available to your public visitors right away.
- Click Create to create the new agent.

The new agent is just a normal agent at this point, so you can change any of its settings normally. Starting, stopping, or previewing the agent all works the same as other Express Agents.
Note that there's a "Start Immediately" option available when creating an agent from a template. You can default this option to checked using the "Templated agents created with this macro should default to Start Immediately" option at the macro level (see first section above).
Reference: Field-Level Options
When defining the Fields for your macro, you would usually provide name, type, and required options for each field, as shown in the section about defining fields (see above). The Insert Field button makes this quick and easy.
There are a few other options available at the field level, explained briefly in the table below.
| Field Option | Description |
|---|---|
name | A friendly name for the field. The name is shown in the form that's shown when setting up an agent from the macro. |
type | The type of data that should be collected from the admin user when setting up an agent. At this time, the only documented type is string. |
required | Either true or false to indicate whether the admin user must fill out this field when setting up an agent. If false, the field is shown as "optional". |
valid_re | An optional regular expression to use to validate the value provided by the field. If the value provided doesn't match the regular expression, the admin user won't be able to proceed in setting up the agent. |
Updated over 1 year ago